Category Archives: fun
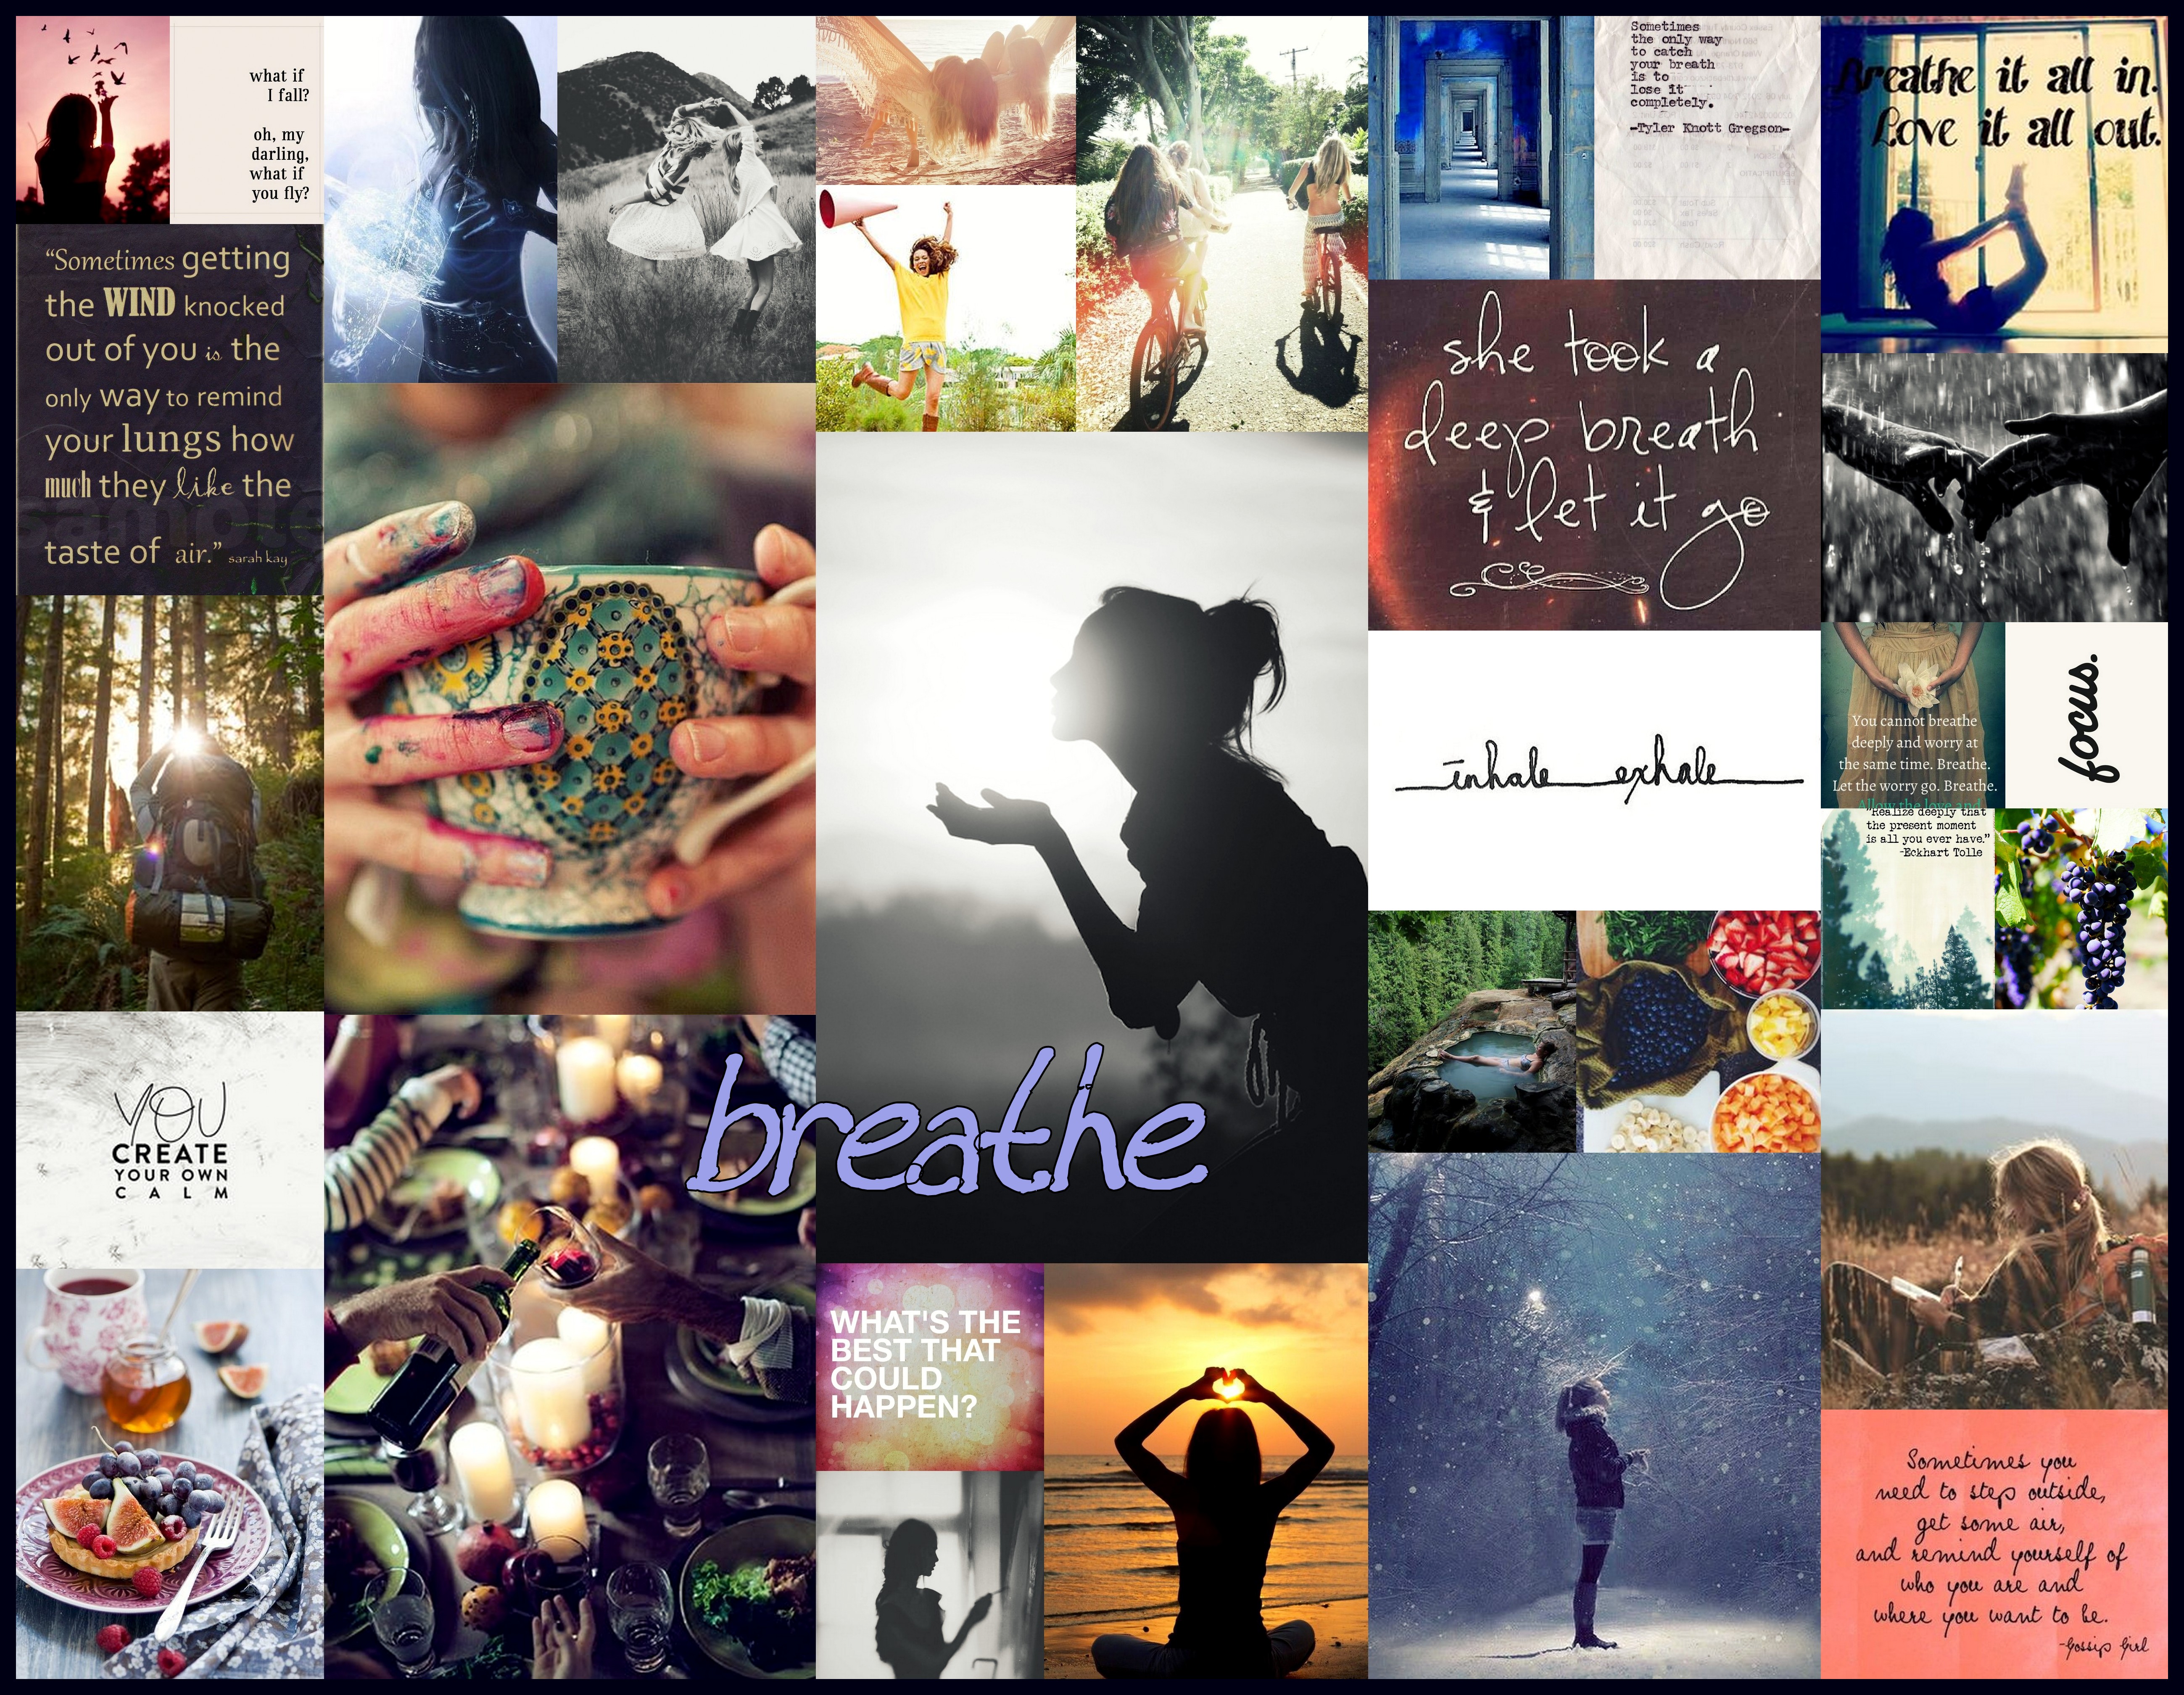
breathe
One of the most awesome things I do every year is devote some focused time to, put simply, reflect on where I’ve been, where I am and where I want to be, both literally and figuratively. I do most of this through both a self-designed personal retreat and a program called the Stratejoy Holiday Council. Once the dust of this reflection settles, one of the many things I emerge with is a theme. It may be a word or a phrase. It may have a whole story that builds up to it or it may have been born out of my time of reflection. It falls into the rhythm of my heartbeat, speaks truth and inspires my goals. For me, the value of my theme for the year (or whatever amount of time it remains) is grand.
All that said, I wanted to share my theme for the present time.
Breathe.
I could write much more to draw out the beauty of how this theme developed and what it means to me, but, instead, I will share the visual representation and encourage this process of listening to your own voice, creating a collage of cravings and moving with more strength and love through YOUR journey. 🙂
apple cider sangria

First of all, apple beverages are delicious. Let’s get that clear. Apple juice, apple wine, apple cider. LOVE, love, love. So, naturally, upon discovering this autumn apple cider champagne sangria recipe on the beautiful blog kirantarun, it had to be made!
Confession: I totally made this for Thanksgiving last year, but was lazy about sharing it with the blogosphere. However, the good news is I loved it so much that I am making it again and choosing to be less lazy. 🙂
My days journey toward sangria began with a LOT of apples. I started by making cider, which basically equates to cutting up said lot of apples and boiling them for hours. Then, the liquid gets separated from the rest of the apple remains through a process I have not quite mastered, as it takes me about 3 different strainers and at least that many bowls and pitchers to accomplish. So worth it though. And don’t worry about the non-liquid part of that apple boil because that got turned into apple butter! Also takes several hours of boiling. Also so worth it!

I could talk more about the cider and butter, but right now, this is about sangria. (However, if you have the time to make cider and/or butter and have your house smell like apples and cinnamon all day long, I highly recommend it)
Back to the sangria…delicious, crisp fall holiday feeling, spicy fig and cranberry soaked sangria. Yum.
 Ingredients:
3 apples, sliced (I used a couple different types…honey crisp are great!)
1/2 cup dried cranberries
1/2 cup halved dried figs
1 cup fruity red wine (I used Merlot)
3 cups apple cider
4 whole cinnamon sticks
1/2 tbsp whole cloves
1/8 tsp grated nutmeg
something bubbly or sparkly like champagne (I use a sparkling muscat from a local winery for this)
Directions:
Super simple.
1. Combine the ingredients (less the sparkly) and let them soak together (overnight, if possible).
2. When ready to drink, pour into glass and top off with whatever type of bubbles or sparkles you choose.
3. Enjoy!
Again, this was totally inspired by this post. (thank you)
I will post more pics later. 🙂
Cheers and Happy Holidays!
ode to joy indeed
Recently, I saw this video and was totally inspired. It is a musical flashmob that took place as part of a celebration in Sabadell, Spain.
Last night, I watched Brandi Carlile perform with the Oregon Symphony and was also totally inspired. During the performance last night, I was wishing that everyone I knew could be there for the experience and was also reminded and moved to share this video.
Music has so much power to inspire. In fact, it is indescribable, which is why there really isn’t much else I can say here.
Enjoy!
blueberry lemonade sangria
I was browsing the little recipe cards at New Seasons the other day and this sounded delicious, so I picked it up. Sweet and simple, it was delicious.

Ingredients:
1 1/2 cups frozen blueberries
1 (12oz) can frozen pink lemonade concentrate
1 bottle dry white wine (I used chardonnay)
1 liter lemon-lime soda (I used sprite)
Mix the berries, lemonade concentrate and wine together and chill. Add cold soda and serve!
I poured the mixture into glasses and then added the soda, along with a couple frozen strawberries.
Cheers!
tutu fun
 What turned into an explosion of tulle, glitter and tutu fun started quite innocently with a picture of a dancer that inspired me. In response to that inspiration, I decided to make myself a tutu. Normal, right? Once said tutu was created, I thought, “This would be a great project for all the kids I take care of!”, not fully realizing I was secretly on a mission to invade my world (and employers and friends houses) with glitter. That was followed by the creation of several more tutus for my friends and their kids. Dropping surprise tutu packages in the mail for a bunch of little girls is pretty stinking fun. At the end of the day, which I doubt the “tutu project day” has officially ended, I created or helped create 11 tutus. Okay, yeah, touching story I know, but shall we get to how to make the tutus??? Yes.
What’s great about this project is that it is fairly simple and inexpensive and has the potential to infuse joy/expression/fun for quite some time. I had heard that there was a no-sew way to make tutus, so I just googled it and found a video on youtube, which I am also including as a link at the end of the post.
What’s Needed:
fabric (which will probably be mostly tulle)
hairband or ribbon
scissors
 What To Do:
1. First, a trip to the fabric/craft store is in order. I ended up on several trips and buying a variety of colors and types of tulle. I also found some rolls of tulle, which saved some of the cutting.
(I find the thinner tulle to be more clingy and glittery tulle to be very generous in sharing its glitter with anything it touches as random fyi’s)
In addition to tulle, pick up ribbon or stretchy fabric headbands for the waistband if you don’t have those things.
2. Cut fabric into strips. The size of the strips will depend on the size and style of tutu that you want to create, but they should be twice the length desired for the tutu (because they will basically be folded)
The width doesn’t really matter. but I made most of mine about 3 or 4 inches wide.
The easiest way to cut the strips is to cut a large piece of fabric to the correct length, roll it up and then cut into pieces.
3. Attach the fabric to the waistband. This process is absolutely easy enough for a child to do, but might take a few tries to get the hang of.
First, fold a cut strip of the tulle in half.
Then, hold the loop side next to or under the ribbon or hair band.
Finally, pull the ends around the waistband and through the loop to secure.
(check out the link to the video below if that doesn’t make sense) 🙂
Once a strip of fabric has been secured, it can be pulled tight or left loose. It is really a matter of preference. I like them a little loose so that I can still move them around a bit if I want to squeeze a different color in somewhere or simply get more strips onto the tutu.
If a ribbon is being used, I recommend measuring it around the waist and tying knots on both ends where the ribbon meets, leaving plenty of ribbon for making a tie in the back when it is worn. This way, all of the tulle will stay secured within the knots and it will also be easier to tie later.
When using the hairbands, try them on the childs waist first to make sure that it doesn’t feel too tight.
Attach tulle strips to the waistband until you are satisfied with the amount of fabric on the tutu! Have fun with the colors and varieties of fabric.
4. Dance! 🙂
Check out this youtube no-sew tutu tutorial if you need a more visual instruction.
Also, here is a photo from my other blog that I took of one of the kiddos dancing around in their new tutu if you feel like checking it out.
Have fun!

hearty fruit kabobs
How fabulous are these?!?

I knew I had to make these the first time I saw the idea. Valentines dinner gave me the perfect excuse, though they would obviously be lovely any day. 🙂
This was super simple and a lot of fun. It did take a tiny bit of a time commitment to cut the fruit and assemble, but it was worth it.
 What’s Needed:
Fruit. Be creative! (I used watermelon, kiwi, cantaloupe, pineapple, strawberries and blueberries)
Heart Shaped Cookie Cutter
Kabob Sticks (or whatever they are called…they have them at most grocery stores)
I bought halves of the pineapple and melons and cut slices of desired thickness to cut the hearts. The kiwi and strawberries were easy to quickly slice and heart up. One thing I would say is to make sure the hearts are thick enough so that they stay intact on the stick. I made mine about half an inch thick.
I then put one of each fruit on each stick with blueberries in between. A lot of fun could be had with less fruit or more fruit or fun color arrangements!
I thought about making a yogurt dip with a little bit of cinnamon for these, but just kinda forgot to…
I went for the breakfast for dinner thing with these and served with eggs, bacon and heart-shaped pancakes, of course!
Enjoy!
This beautiful idea was inspired by mint in the middle
1000
Something awesome is happening on my photo blog, daily perspective, right now. I just posted my 1000th photo a week ago! To celebrate, I am giving away free prints of photos from the blog and you get to choose which one you want!! Find out more on the blog and tell me your favorite before the holiday ends!!! 🙂


