Category Archives: food
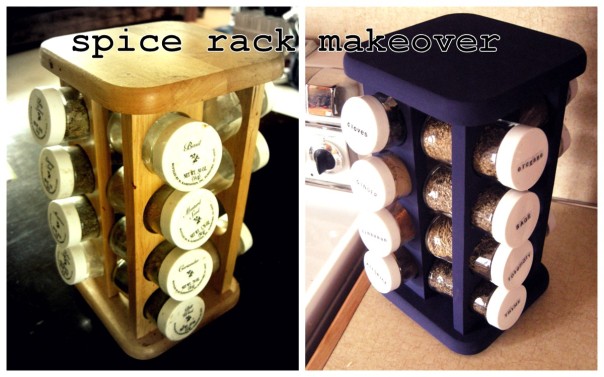
spice rack makeover
As I pursue my desire to breathe more fully this year, one of the things I have done is declutter and simplify the spaces around me.
After making my way through the spaces I live and work, I found that one place making me feel, well, claustrophobic, was the shelf of spices in the kitchen. Something had to be done!
The first step was to organize what i already had.
A handful of the spices in the cupboard were new and used often, but many of them had been around for years or were rarely being used. I tossed out what was expired and offered up duplicates or things I don’t use often to friends.
Next, a new collection of spices was built.
I made a list of what I use most and consulted some friends and websites to round out the list. I ended with 20 seasonings, as follows:
salt
pepper
alpine touch (Montanas special spice)
cumin
onion powder
coriander
paprika
oregano
sage
rosemary
thyme
cloves
ginger
cinnamon
allspice
chili powder
curry powder
bay leaves
fennel seed
Obviously, this was catered toward my preferences, but I did find it nice to encounter lists like this along the way.
The new spices that were needed were purchased in the bulk spice section, which both allowed the correct amount to be purchased for the size of the jars and was much cheaper than buying them in containers.
Then came the actual makeover of the spice rack.
I had been carrying around an old spice rack for years, but didn’t really like the appearance or selection of spices, so it was the perfect candidate for a makeover.
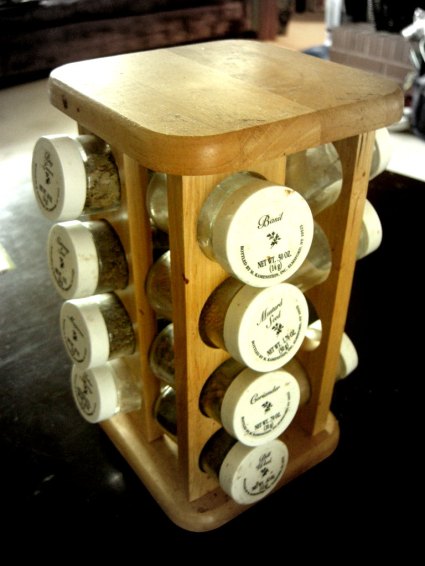
The spice jars were cleaned and old labels peeled off.
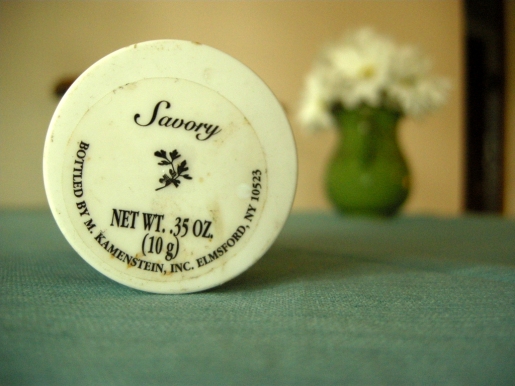
Acrylic craft paint was used to give the rack the perfect new color and finish.

Simple letter stickers were used to label the lids of the jars
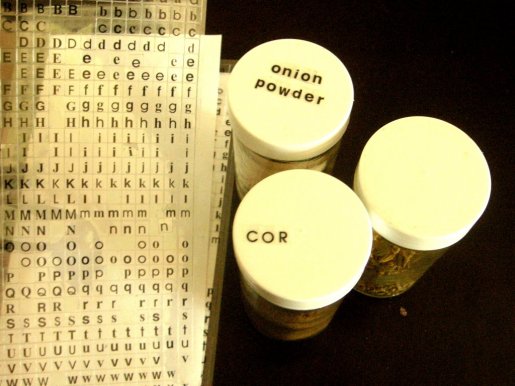
Finally the jars were filled, the rack was filled, a new space was made on the counter for the rack and, voila, makeover complete!
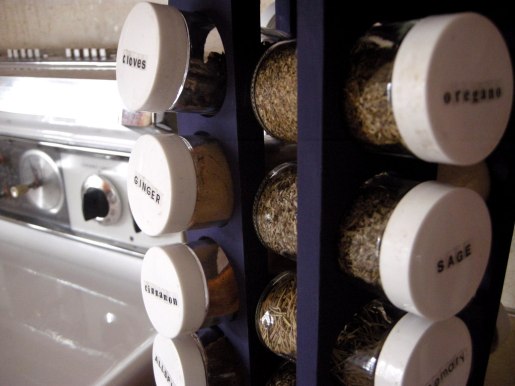
Thanks to this spice rack makeover, I can cook without the claustrophobia. 🙂
apple cider sangria

First of all, apple beverages are delicious. Let’s get that clear. Apple juice, apple wine, apple cider. LOVE, love, love. So, naturally, upon discovering this autumn apple cider champagne sangria recipe on the beautiful blog kirantarun, it had to be made!
Confession: I totally made this for Thanksgiving last year, but was lazy about sharing it with the blogosphere. However, the good news is I loved it so much that I am making it again and choosing to be less lazy. 🙂
My days journey toward sangria began with a LOT of apples. I started by making cider, which basically equates to cutting up said lot of apples and boiling them for hours. Then, the liquid gets separated from the rest of the apple remains through a process I have not quite mastered, as it takes me about 3 different strainers and at least that many bowls and pitchers to accomplish. So worth it though. And don’t worry about the non-liquid part of that apple boil because that got turned into apple butter! Also takes several hours of boiling. Also so worth it!
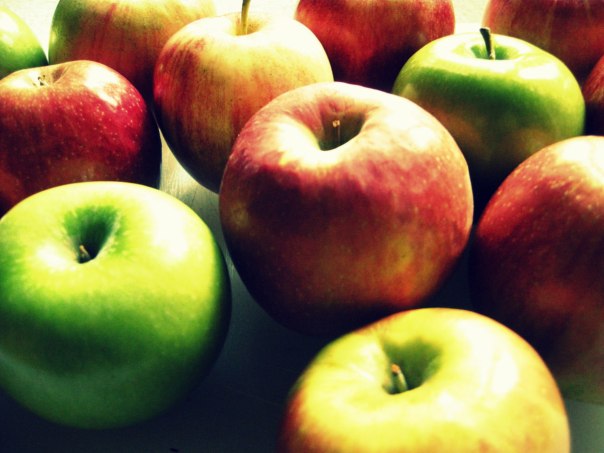
I could talk more about the cider and butter, but right now, this is about sangria. (However, if you have the time to make cider and/or butter and have your house smell like apples and cinnamon all day long, I highly recommend it)
Back to the sangria…delicious, crisp fall holiday feeling, spicy fig and cranberry soaked sangria. Yum.
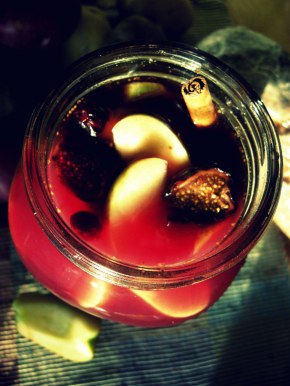 Ingredients:
3 apples, sliced (I used a couple different types…honey crisp are great!)
1/2 cup dried cranberries
1/2 cup halved dried figs
1 cup fruity red wine (I used Merlot)
3 cups apple cider
4 whole cinnamon sticks
1/2 tbsp whole cloves
1/8 tsp grated nutmeg
something bubbly or sparkly like champagne (I use a sparkling muscat from a local winery for this)
Directions:
Super simple.
1. Combine the ingredients (less the sparkly) and let them soak together (overnight, if possible).
2. When ready to drink, pour into glass and top off with whatever type of bubbles or sparkles you choose.
3. Enjoy!
Again, this was totally inspired by this post. (thank you)
I will post more pics later. 🙂
Cheers and Happy Holidays!
pinspiration
It is a rainy and rare lazy Saturday afternoon and pinterest has me rather inspired by some cozy ideas that seem to match my mood. Since I am in a bloggy mood as well, here are a few of my favorite new pins from today…
1. Coffee Aroma Candles
Seriously, how simple and fabulous is this?
Candle holder + coffee beans + tea light = house smells like a coffee shop.

2. Dresser Bench
I am super inspired by this. It would be a fun project and would make such a great item for an entry, bedroom or guest room!

I would normally link this to original site,
but this was on etsy and is no longer available.
3. Pumpkin Bread Pudding
I read these seven words in the description of this and was sold:
cinnamon, ginger, pumpkin, spiced, bourbon soaked raisins
Can’t wait to try it!
4. Cozy Knit Scarf
I want to put this on right now. I love the mood of it. I love the color. I love the style.
Also, I have had this theory that I am going to break out the knitting supplies and this might be the inspiration that causes me to actually follow through!
blueberry lemonade sangria
I was browsing the little recipe cards at New Seasons the other day and this sounded delicious, so I picked it up. Sweet and simple, it was delicious.
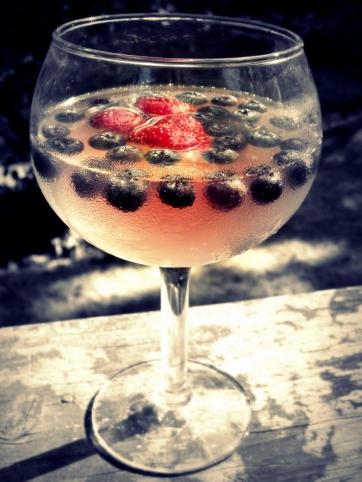
Ingredients:
1 1/2 cups frozen blueberries
1 (12oz) can frozen pink lemonade concentrate
1 bottle dry white wine (I used chardonnay)
1 liter lemon-lime soda (I used sprite)
Mix the berries, lemonade concentrate and wine together and chill. Add cold soda and serve!
I poured the mixture into glasses and then added the soda, along with a couple frozen strawberries.
Cheers!
almonds (almond butters)
I have loved almonds for as long as I can remember. I use them often, grabbing a handful for a quick snack, throwing them slivered into salads and have even used their oil in homemade beauty products. And now, I have (finally) ground them up and made almond butter!
Lucky for me, there are lots of good reasons to eat almonds.
Three reasons almonds are so good for you.
 1. Heart Health.
There are many reasons almonds are good for your heart. For one, they are high in healthy fat, which helps maintain good cholesterol levels. They also have lots of potassium and little sodium, both factors that help regulate blood pressure. As if that wasn’t enough, the amount of vitamins and minerals in almonds, such as vitamin E and magnesium have also been found to be key players in heart health.
2. Brain Health
Almonds have good levels of things like omega-3’s and vitamin E that have been linked to healthy brain function. They also contain phenylalanine, which is a chemical linked to cognitive function.
3. Energy
One of the reasons almonds produce energy is because they provide a lot of calories, but there are also high amounts of several vitamins and minerals that play an important role in energy production. The strong presence of riboflavin, copper and manganese help turn those calories into energy.
 SIMPLE ALMOND BUTTER
Ingredients:
Raw Almonds
Salt (optional)
HONEY MAPLE ALMOND BUTTER
Ingredients:
2 cups Raw Almonds
1 teaspoon Extra-Virgin Coconut Oil
2 Tablespoons Honey or Maple Syrup (I used 1 T of each)
Sea Salt (optional)
this recipe was inspired bythe post on Alexandra’s Kitchen featuring The Sprouted Kitchen cookbook
CINNAMON FLAX ALMOND BUTTER
Ingredients:
2 cups Raw Almonds
1 teaspoon Cinnamon
1 Tablespoon Flaxseed
Sea Salt (optional)
Directions:
This applies to all of the above 🙂
1. Place almonds in food processor and blend until natural oils begin to come out. This may take a while, up to 10 minutes! (be sure to give your almond blender a break)
2. Add other ingredients. Blend until desired consistency is reached.
Simple, right? And so delicious!
Some notes:
~I tried five different pieces of equipment on my journey to making yummy almond butter from a grinder to a small bullet style blender and normal blender to both a small and larger sized food processor. The conclusion? Bigger blade and motor equals easier to make almond butter. I did not get the consistency I wanted from my small (loyal smoothie making) blender. I did with a normal monster blender, but it was a huge pain to get out and clean out. The larger food processor worked the best!
~I have seen a lot of recipes where the almonds were toasted first. I did not do this, but plan to try at some point.
~Refrigeration. Technically, nut butters are supposed be refrigerated, but it’s frustrating because it does change the texture. If you plan to use it within the week, however, I say cover it and leave it out.
Yum! Enjoy!
food in jars
 Deciding to put more food in jars started simply as an effort to organize my shelf space, but has resulted in several positive benefits.
I was feeling frustrated by the stuff hiding in the back, the amount of plastic and the overall cluttered feeling. Around the time I did my closet cleanse, I also sorted through my storage bins in the garage (yes, I was in full declutter mode) and found a couple jars that had belonged to my grandma. I had always loved the jars and thought, “I should be using these”. And thus began my shelf full of jars.
I started (and my roomies helped) saving used jars and filling them with items formerly stored in plastic bags and containers in a rather jumbled fashion. Soon enough, most of one shelf was full of jars and the other shelf easily holds other items, such as boxed granola bars, oils, pasta and canned goods.
So, what am I storing in the jars? Right now, I have 18 of them and they hold pancake mix, brown rice, quinoa, wheat berries, oats, black beans, cashews, peanuts, slivered almonds, sliced almonds, sunflower seeds, pumpkin seeds, chocolate chips, chocolate covered ginger, raisins, dried cranberries, dried mangoes and goji berries.
For me, here have been several benefits to having food in jars:

It feels more simple and clean. And that was my original intent, after all. Being able to simply shuffle some jars around and clearly see what is in them all feels like a breath of fresh air compared to my old shelf. It also enhances my effort to cut down on plastics.
Reuse makes me happy.
There is something about being able to reuse that just feels good. I smile when I see my grandmas jars and wonder where they originally came from. 🙂 Also, did you know that glass takes a loooooonnnggg time (I’m talking a million years here) to break down? Being able to reuse or recycle it helps the environment!
I am eating more healthy.
You can see from the list of things being stored in the jars that they are mostly healthy grains, nuts, seeds and dried fruits. (non-processed foods) When I open my cupboard and see these things, I brainstorm meal ideas with them in mind. When I feel like snacking, I often end up reaching for nuts and fruits. I have been making efforts to eat more clean and this has only helped. And…
I am saving money.
Most of what I buy for the jars comes from the bulk container/pay by the pound section of the store and I have absolutely concluded that it is cheaper to buy this way.
The other thing I love about my jars is the variety. For me, there is something about having organization with a twist of randomness that puts my creative self at ease. I look at my shelf of jars and take a deep breath because it is easy to see everything and retrieve anything. And then I smile because the jars are different shapes and sizes and the lids are different colors.
Having a shelf of food in jars might not be for everyone, but for me it has been fabulous and I highly recommend it!
gnocchi
A couple days ago, I was browsing through one of my cookbooks (Homemade) and was inspired to try my hand at gnocchi. I am in love with homemade noodles and also love gnocchi, so I was pretty excited to give it a whirl. I found the process to be simple and fun and was really pleased with the results.
 Ingredients:
Potatoes
Bread Flour
Egg
Salt
For every 2 pounds of potatoes (which I found to be two large russets), use about 2 cups of bread flour and 1 egg.
*this made about twice what I needed for one meal for a few people
Directions:
1. Peel, boil and mash the potatoes. (The cookbook recommended boiling before peeling. Boiling with skins supposedly gives them a little more flavor and makes them easier to peel, but I have never tried this. I peeled and then boiled.)
2. Add some flour and some egg to the potatoes and work into a dough. If needed, add more flour and/or egg until the dough is smooth. (I had no idea what exactly the dough was supposed to be like, so I just went with what felt right.) Add a little salt too.
3. Now use your hands to roll the dough out into ropes. Basically, I started with the whole ball of dough and rolled it out until it didn’t fit on my board, cut it in half, rolled that section out, cut that in half and just kept doing this until I felt I had gnocchi thickness sized ropes.
4. Cut the small ropes into individual noodles.
5. Cover with a dish towel until used or cook immediately. To cook, just add noodles to boiling water and they will rise to the top when they are ready, which only takes a few minutes.
6. Enjoy!
 I served my gnocchi with pesto and tomatoes, sausage and a spinach salad, which made for a lovely meal. There was a consensus that this gnocchi felt a little lighter than usual, which I think was preferred (it can be soooo dense sometimes). Now I am excited to experiment with other sauces or stuffings. Chalk up another noodle that I will probably stop buying. 🙂
And again, I got this recipe from Homemade by Yvette van Boven, one of the most beautiful and inspiring cookbooks I have ever seen.
hearty fruit kabobs
How fabulous are these?!?

I knew I had to make these the first time I saw the idea. Valentines dinner gave me the perfect excuse, though they would obviously be lovely any day. 🙂
This was super simple and a lot of fun. It did take a tiny bit of a time commitment to cut the fruit and assemble, but it was worth it.
 What’s Needed:
Fruit. Be creative! (I used watermelon, kiwi, cantaloupe, pineapple, strawberries and blueberries)
Heart Shaped Cookie Cutter
Kabob Sticks (or whatever they are called…they have them at most grocery stores)
I bought halves of the pineapple and melons and cut slices of desired thickness to cut the hearts. The kiwi and strawberries were easy to quickly slice and heart up. One thing I would say is to make sure the hearts are thick enough so that they stay intact on the stick. I made mine about half an inch thick.
I then put one of each fruit on each stick with blueberries in between. A lot of fun could be had with less fruit or more fruit or fun color arrangements!
I thought about making a yogurt dip with a little bit of cinnamon for these, but just kinda forgot to…
I went for the breakfast for dinner thing with these and served with eggs, bacon and heart-shaped pancakes, of course!
Enjoy!
This beautiful idea was inspired by mint in the middle
cranberry jelly
So, in honor of Thankgiving, I thought I would share a recipe I recently discovered.
I have been going crazy over fall inspired food lately, making pumpkin bars and cookies, soup with squash, and apple everything, so it was about time for some cranberries! I had purchased some at farmers market and was looking for ideas, so when I found this simple cranberry jelly option as the holidays were fast approaching, I knew it was the perfect time to try it. It also didn’t hurt that it used apple cider, which I love and had just made a batch of!
I cut the original recipe in half because I only wanted to make a jar or so to start, so feel free to double (or triple or whatever)! Also, just as a random fyi (something I learned along the way), a pound of cranberries equals about 4 cups.
 Ingredients:
2 cups whole cranberries
3/4 cup sugar (I used organic)
1/4 cup apple cider
lemon juice (optional)
Directions:
1. Combine cranberries, sugar and cider and simmer until the cranberries burst. (they will make a fun ‘pop’ sound)
2. Remove the mixture from the heat and stir.
3. Once it has cooled a minute or two, do a taste test. If it is too tart, add a bit more sugar and return to the heat for a minute. If it is too sweet, add a little lemon juice.
4. Once the flavor is right, press the mixture through a food mill or sieve to separate the skins.
5. Place the remaining jelly into a clean jar.
6. Enjoy!!!
I found this amount to make about a small jar of jelly. My understanding is that this recipe holds up fine to a full hot water canning process, so if you’ve got a lot of cranberries on your hand you can make lots and save it for later! For me, I loved something simple and quick that I could just stick in the fridge and enjoy now.
The jelly made a proud appearance on the Thanksgiving dinner table and has also been delicious in cream cheese and turkey sandwiches! Yum!
found original recipe on food in jars
pumpkin chocolate chip bars
 I love breaking out the yummy fall inspired pumpkin recipes once the season rolls around. This recipe was simple, pretty healthy and delicious.
Ingredients:
1/2 cup pumpkin puree
1 whole egg
2 egg whites
1 tbsp vegetable or canola oil
1 cup flour
1 tsp baking powder
1 tsp unsweetened cocoa powder
1/2 tsp ground cinnamon
1/2 tsp ground allspice
1/4 tsp ground nutmeg
1/4 tsp salt
2/3 cup brown sugar, packed
1/2 cup semisweet chocolate chips
Directions:
1. Preheat oven to 350. Coat an 11 x 7 pan with cooking spray, butter or parchment paper.
2. In a large bowl, combine pumpkin puree, eggs and oil until smooth.
3. In a separate smaller bowl, combine flour, baking powder, cocoa powder, spices, salt and brown sugar. Add to pumpkin mixture and mix well. Stir in chocolate chips.
4. Pour evenly into baking pan and bake for 15-20 minutes. Insert toothpick to check for doneness.
5. Enjoy!
originally found on pinterst via pennies on a platter
how to freeze berries beautifully
 Recently, a fellow vendor at farmers market gave me a tip for freezing berries that will change my life. She told me that if you pre-freeze them on a cookie sheet, they freeze as whole berries and do not get smashed together in the bag or container. I do not know how I had never heard this before! I headed home after market excited to try this new trick with my excess of freshly picked berries. After doing a little research and picking up a few other tips, I went for it and am very pleased with the results.
Here is the process:

First, aquire beautiful berries. This go-around was raspberries for me. I recommend checking out your local farmers market!
.
.
.
Next, wash the berries. It works great to place the berries in a strainer or colander of some sort. Then, submerge that into a bowl of water and gently swirl the berries around.
* Using the colander/strainer helps to both keep the berries from getting blasted with water and allows dirt, etc. to drain into the bowl below.
.
.
Let the berries drain and dry for a little while either in the colander/strainer or by laying them out on some paper towel.
.
.
Now arrange the berries onto a baking sheet and stick it in your freezer. I left mine in overnight and it seemed about right.
.
When you take the berries out of the freezer, they will be individually frozen and easy to transfer to a bag or container.
*If you are using a bag, use a freezer bag. I have tried get away with using the non-freezer type. Not the same.
.
.
Place the berries into a bag or container and seal well, being sure to force as much air out as possible.
*If you are using bags and are not lucky enough to have a vacuum sealing system (or are gifted with my inability to properly close bags), try placing a straw at one end of the sealing strip. Squeeze as much air out as you can and then suck the rest out before you close the end of the sealing strip.
.
Don’t forget to mark your bag or container with the contents and date! (easier to do this before you put the berries in a bag)
Place back in freezer to keep and enjoy later!
oats (peanut butter banana oatmeal bars)
I’ve always enjoyed oatmeal and oatmeal raisin cookies. I also enjoyed scooping up a huge bag of these whole grains yesterday for less than $2.00. But even more than this, I thoroughly enjoyed taking the time learn some of the many health benefits to oats.
Three reasons oats are so good for you:
1. Fiber. They contain a specific type called beta-glucan, which helps keep cholesterol low. In fact, studies show that when a diet includes the amount of fiber found in one bowl of oatmeal, cholesterol is typically lowered 8%-23%! This also means dramatically reduced risk for heart disease!
2. Manganese. Oats have lots of it and it plays lots of healthy roles! It helps our bodies metabolize fats and carbohydrates, absorb calcium, maintain healthy blood sugar levels and promote normal nerve function. (just to name a few)
3. Iron. Of course there are many other great food sources of iron, but there are also many people that are iron deficient and anemic. It is estimated that around 30% of people do not get enough iron and that number is higher in kids and pregnant women. Iron is important because our bodies need it to make the protein hemoglobin, which is used to carry oxygen in our blood cells around our body. So, yeah, pretty important.
PEANUT BUTTER BANANA OATMEAL BARS
 Ingredients:
1 1/2 cups oats (original recipe calls for quick…I used old fashioned)
1/3 cup packed light brown sugar
1 teaspoon baking powder
1/2 teaspoon kosher salt
1 teaspoon ground cinnamon
1 teaspoon vanilla extract
1/2 cup milk
1 large egg, lightly beaten
1-2 large mashed banana
1/4 cup creamy peanut butter
Directions:
1. Preheat the oven to 350°
2. Mix together the oats, brown sugar, baking powder, salt and ground cinnamon.
3. Add in the vanilla extract, milk and egg. Stir together.
4. Add the mashed banana and peanut butter. Combine all of the ingredients.
5. Pour the mixture into a lightly greased 8 by 8 inch metal baking pan. Bake for 20 minutes.
Cool Completely. Cut into squares and enjoy!
These things are great! They taste like some sort of wonderful lovechild of a peanut butter dipped banana, baked oatmeal, and banana bread. And for how delicious they taste with no butter or oil, only a small amount of sugar and several healthy ingredients in the mix, it is hard to go wrong! I will definitely make these again. (next time I will use the metal pan, though. I used glass and had to bake them much longer)
Recipe source: Rumbly in my Tumbly
kale (green smoothie)
 A couple years ago, I didn’t know much about kale and certainly didn’t eat much of it. Today, I have come to appreciate its incredible nutritional value.
Three reasons to eat Kale:
1. To fight cancer. Kale is a superstar in the cancer fight for many reasons. A major one is that it contains some of the most powerful antioxidants possible, carotenoinds and flavonoids.
2. For your eyes. Kale contains both high amounts of beta-carotene, which is beneficial to good vision and lutein, which aids in the prevention of macular degeneration.
3. For your heart. Thanks to a healthy dose of fiber, Kale is great for keeping blood pressure down and reducing the risk of heart disease.
Kale has plenty more health benefits, but the first time I tried it, I didn’t like it and I don’t tend to eat what I don’t like. But then, one magical day at a farmers market, I tried some that had been cooked with garlic and olive oil. Simple and surprisingly delicious.
In all honesty, I still don’t really like kale as a salad green, but here is another recipe that I love, is easy to make and is packed with health benefits:
GREEN SMOOTHIE
2 cups raw Kale
1 Banana, frozen (or not)
1/3 cup Orange Juice
1/4 cup Milk
1 Tablespoon Coconut Oil (optional)
1 Tablespoon Flaxseed Meal (optional)
1 teaspoon Honey (optional…I add it to fight allergies)
Directions:
Combine all ingredients into a blender and blend until smooth. Enjoy!
Found the original recipe here (thanks to pinterest)
wild salmon (maple salmon)
Three reasons your body will love you for eating wild salmon:
1. Omega-3 fatty acids. These acids are so important because the body cannot make them on its own. They improve brain function, boost “good” cholesterol, guard against inflammation, lower blood pressure and reduce the risk of cancer and heart disease!
2. Vitamins D and B12. Vitamin D is hard to find in food and, unfortunately, deficiency is common. One role it plays is to help our bodies absorb calcium. Vitamin B-12 is important for red blood cell production and proper nerve function.
3. Selenium. It is a mineral that we need for thyroid function and is a very powerful player for our immune system.
MAPLE SALMON
Made this for dinner last night with fresh salmon and it was delicious. I was honestly a little apprehensive about the sweet and salty flavor mix, but it balanced out quite nicely. Will definitely make it again!
1 pound Salmon
1/2 cup Maple Syrup
3-4 Tablespoons Soy Sauce
2 Garlic Cloves, minced
1/4 teaspoon Ground Black Pepper
Fresh Ginger, to taste
Directions:
1. In a small bowl, combine maple syrup, soy sauce, garlic and pepper.
2. Place salmon in glass baking dish and coat with syrup mixture. Cover and marinate in the refrigerator for 30 minutes, turning at least once.
3. Preheat oven to 400 degrees F
4. Remove salmon from fridge and top with ginger. Place baking dish in preheated oven and bake, uncovered, for about 20 minutes or until salmon is slightly opaque and easily flaked with a fork.
I paired it with roasted red potatoes, my favorite salad (spinach, strawberries, feta, almonds), fresh bread with honey butter and a crisp white wine. Yum Yum!
Found the original recipe here.
