Monthly Archives: April 2013
tutu fun
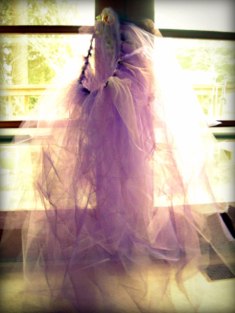
 What turned into an explosion of tulle, glitter and tutu fun started quite innocently with a picture of a dancer that inspired me. In response to that inspiration, I decided to make myself a tutu. Normal, right? Once said tutu was created, I thought, “This would be a great project for all the kids I take care of!”, not fully realizing I was secretly on a mission to invade my world (and employers and friends houses) with glitter. That was followed by the creation of several more tutus for my friends and their kids. Dropping surprise tutu packages in the mail for a bunch of little girls is pretty stinking fun. At the end of the day, which I doubt the “tutu project day” has officially ended, I created or helped create 11 tutus. Okay, yeah, touching story I know, but shall we get to how to make the tutus??? Yes.
What’s great about this project is that it is fairly simple and inexpensive and has the potential to infuse joy/expression/fun for quite some time. I had heard that there was a no-sew way to make tutus, so I just googled it and found a video on youtube, which I am also including as a link at the end of the post.
What’s Needed:
fabric (which will probably be mostly tulle)
hairband or ribbon
scissors
 What To Do:
1. First, a trip to the fabric/craft store is in order. I ended up on several trips and buying a variety of colors and types of tulle. I also found some rolls of tulle, which saved some of the cutting.
(I find the thinner tulle to be more clingy and glittery tulle to be very generous in sharing its glitter with anything it touches as random fyi’s)
In addition to tulle, pick up ribbon or stretchy fabric headbands for the waistband if you don’t have those things.
2. Cut fabric into strips. The size of the strips will depend on the size and style of tutu that you want to create, but they should be twice the length desired for the tutu (because they will basically be folded)
The width doesn’t really matter. but I made most of mine about 3 or 4 inches wide.
The easiest way to cut the strips is to cut a large piece of fabric to the correct length, roll it up and then cut into pieces.
3. Attach the fabric to the waistband. This process is absolutely easy enough for a child to do, but might take a few tries to get the hang of.
First, fold a cut strip of the tulle in half.
Then, hold the loop side next to or under the ribbon or hair band.
Finally, pull the ends around the waistband and through the loop to secure.
(check out the link to the video below if that doesn’t make sense) 🙂
Once a strip of fabric has been secured, it can be pulled tight or left loose. It is really a matter of preference. I like them a little loose so that I can still move them around a bit if I want to squeeze a different color in somewhere or simply get more strips onto the tutu.
If a ribbon is being used, I recommend measuring it around the waist and tying knots on both ends where the ribbon meets, leaving plenty of ribbon for making a tie in the back when it is worn. This way, all of the tulle will stay secured within the knots and it will also be easier to tie later.
When using the hairbands, try them on the childs waist first to make sure that it doesn’t feel too tight.
Attach tulle strips to the waistband until you are satisfied with the amount of fabric on the tutu! Have fun with the colors and varieties of fabric.
4. Dance! 🙂
Check out this youtube no-sew tutu tutorial if you need a more visual instruction.
Also, here is a photo from my other blog that I took of one of the kiddos dancing around in their new tutu if you feel like checking it out.
Have fun!
the makeup cleanse
 Having a hard time digging out your favorite lip gloss every morning? Mascara getting clumpy? If cosmetics are starting to feel more like clutter, cleaning out the makeup bag can be an easy way to simplify and treat your skin well.
Makeup doesn’t last forever and over time it can harbor bacteria which causes skin irritation and breakouts as well as other infections such as conjunctivitis (pinkeye). So, how do you know when makeup should be tossed? If it starts to smell funny, definitely toss it. If the consistency or color starts to change or you notice skin irritation when it is applied, its probably time to ditch it as well. Otherwise, here is a general timeline for the healthy life of most products:
Foundation: Water-based: 12 months Oil-based: 18 months
Concealer: 12-18 months
Powder/Blush: 1-3 years
Mascara: 3-6 months
Liquid/Cream Eyeliner or Shadows: 6-12 months
Eyeshadow: 1-3 years
Eye/Lip Pencils: 1-3 years
Lisptick/Lip Gloss: 1-2 years
Nail Polish: 1-5 years
A few extra tips:
Treat Your Makeup Well. There are several things you can you can do to extend the life of your makeup. First of all, store it in a cool and dry location. That makeup sitting in the sunny car or open on the bathroom counter while you shower is going to go bad more quickly than the makeup in a fun bag on your dresser. In addition to storage location, sharpen lip and eye pencils regularly and try not to pump mascara too much. Both of these tricks, along with the next tip, will fight bacteria.
 Wash Your Brushes! This is one of the most important things you can do for your makeup and your face. If you have never washed your makeup brushes, prepare to be disgusted. You can purchase a brush cleaner if you like or just use a mild soap of some sort. I prefer to use a natural shampoo because, to me, brushes are more like hair. Wash your brushes in the bathroom sink with water and soap and then lay them out to air dry. This should be done often. I try to do it every month. If you use other applicators, such as sponges, be sure to wash or replace those often as well.
Keep Organized. If you keep your makeup organized and accessible, you will save money, time and sanity. Store makeup you use on an everyday basis in a handy location and in a way that makes it easy to move around. You could use a fun makeup bag or colorful containers such as bowls or baskets. Any excess can be stored in a makeup bag, bin or mini drawers and kept in a drawer or closet so that it is not in the way when you don’t need it.
Have Fun With It! Learn some new makeup tips. Treat yourself to a new color or makeup bag. Have a spa day and use that nail polish. Or go on a girls night out with that glitter blush you’ve been ignoring! 🙂
Enjoy your makeup cleanse!
almonds (almond butters)
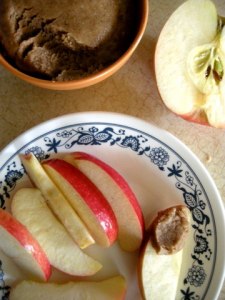
I have loved almonds for as long as I can remember. I use them often, grabbing a handful for a quick snack, throwing them slivered into salads and have even used their oil in homemade beauty products. And now, I have (finally) ground them up and made almond butter!
Lucky for me, there are lots of good reasons to eat almonds.
Three reasons almonds are so good for you.
 1. Heart Health.
There are many reasons almonds are good for your heart. For one, they are high in healthy fat, which helps maintain good cholesterol levels. They also have lots of potassium and little sodium, both factors that help regulate blood pressure. As if that wasn’t enough, the amount of vitamins and minerals in almonds, such as vitamin E and magnesium have also been found to be key players in heart health.
2. Brain Health
Almonds have good levels of things like omega-3’s and vitamin E that have been linked to healthy brain function. They also contain phenylalanine, which is a chemical linked to cognitive function.
3. Energy
One of the reasons almonds produce energy is because they provide a lot of calories, but there are also high amounts of several vitamins and minerals that play an important role in energy production. The strong presence of riboflavin, copper and manganese help turn those calories into energy.
 SIMPLE ALMOND BUTTER
Ingredients:
Raw Almonds
Salt (optional)
HONEY MAPLE ALMOND BUTTER
Ingredients:
2 cups Raw Almonds
1 teaspoon Extra-Virgin Coconut Oil
2 Tablespoons Honey or Maple Syrup (I used 1 T of each)
Sea Salt (optional)
this recipe was inspired bythe post on Alexandra’s Kitchen featuring The Sprouted Kitchen cookbook
CINNAMON FLAX ALMOND BUTTER
Ingredients:
2 cups Raw Almonds
1 teaspoon Cinnamon
1 Tablespoon Flaxseed
Sea Salt (optional)
Directions:
This applies to all of the above 🙂
1. Place almonds in food processor and blend until natural oils begin to come out. This may take a while, up to 10 minutes! (be sure to give your almond blender a break)
2. Add other ingredients. Blend until desired consistency is reached.
Simple, right? And so delicious!
Some notes:
~I tried five different pieces of equipment on my journey to making yummy almond butter from a grinder to a small bullet style blender and normal blender to both a small and larger sized food processor. The conclusion? Bigger blade and motor equals easier to make almond butter. I did not get the consistency I wanted from my small (loyal smoothie making) blender. I did with a normal monster blender, but it was a huge pain to get out and clean out. The larger food processor worked the best!
~I have seen a lot of recipes where the almonds were toasted first. I did not do this, but plan to try at some point.
~Refrigeration. Technically, nut butters are supposed be refrigerated, but it’s frustrating because it does change the texture. If you plan to use it within the week, however, I say cover it and leave it out.
Yum! Enjoy!
the first time
Yesterday, I stumbled into a poem
New to me that I love. Love.
Hours pass and I then discover that April is the month.
How fitting, I thought.
This will be the first time I celebrate national poetry month.
With in my heart and on the page
so many words
The poem I read:
THE FIRST TIME
by Mindy Nettifee
I.
The first time your heart was torn from your chest,
You thought you were dying.
You knew you could not live with the empty space.
So you replaced your heart with metaphors
And set out to create a world where the metaphor was unbreakable.
Now look what you’ve done—
You can’t breathe so you write.
You can’t hurt so you drink rum and pour our pirate chanties.
You can’t want revenge so you leave.
II.
When I see you I have two thoughts:
You are the reason The Smith’s wrote songs,
And my god, you are beautiful.
You are so beautiful
Blinking stars go blind.
But I can see this is going to get ugly.
The metaphors don’t make you feel whole anymore.
You sell out your deepest insecurities for a handful of laughs.
This life has you wound so tight you make grandfather clocks look relaxed.
You hold your body like banks hold money—all locked up.
Your shoulders are glass rocks waiting for the next attack.
But you’ve got it all wrong.
You don’t survive history.
History survives you.
There is no breakthrough without breakdown.
III.
If you’re going to break, shatter.
No explanations.
No limp-legged dog excuses.
No messing with this bullet proof vest fury
So popular with the cops and the presidents.
You’ve got to break like Texas.
You’ve got to take the pain from the safety valve of your heart
And return it to your fists.
Fight your better judgment ‘till you’re sinister again,
‘till your body remembers what it already knows how to do—
bend back
and manifest grief.
Scream torches ‘till you embarrass the enlightened.
Please. No more polite conversations with your death wish.
Give it something useful to do.
Change your life.
Cause I can’t stand to see you like this.
So blue, my eyes turn green in your presence.
Listen—you are so beautiful,
Grass pushes through sidewalk cracks just to kiss your feet.
IV.
Maybe no one ever told you,
But the heart IS a metaphor.
Yours is growing so strong
You’ll have your rhythm back any day now—
Loving like rumours spread.
Dreaming like lunatic spacemen jump from their suits.
Living like you never forgot how.
30 ways to celebrate national poetry month


