Category Archives: diy projects
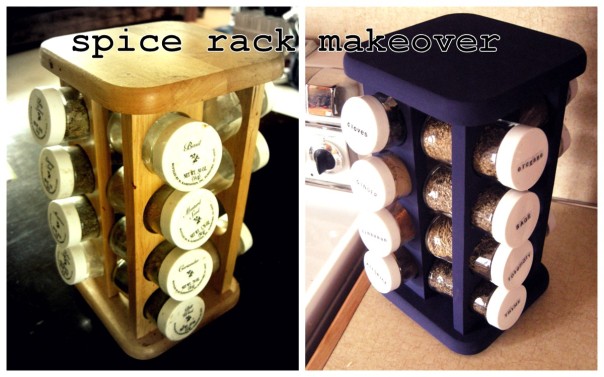
spice rack makeover
As I pursue my desire to breathe more fully this year, one of the things I have done is declutter and simplify the spaces around me.
After making my way through the spaces I live and work, I found that one place making me feel, well, claustrophobic, was the shelf of spices in the kitchen. Something had to be done!
The first step was to organize what i already had.
A handful of the spices in the cupboard were new and used often, but many of them had been around for years or were rarely being used. I tossed out what was expired and offered up duplicates or things I don’t use often to friends.
Next, a new collection of spices was built.
I made a list of what I use most and consulted some friends and websites to round out the list. I ended with 20 seasonings, as follows:
salt
pepper
alpine touch (Montanas special spice)
cumin
onion powder
coriander
paprika
oregano
sage
rosemary
thyme
cloves
ginger
cinnamon
allspice
chili powder
curry powder
bay leaves
fennel seed
Obviously, this was catered toward my preferences, but I did find it nice to encounter lists like this along the way.
The new spices that were needed were purchased in the bulk spice section, which both allowed the correct amount to be purchased for the size of the jars and was much cheaper than buying them in containers.
Then came the actual makeover of the spice rack.
I had been carrying around an old spice rack for years, but didn’t really like the appearance or selection of spices, so it was the perfect candidate for a makeover.
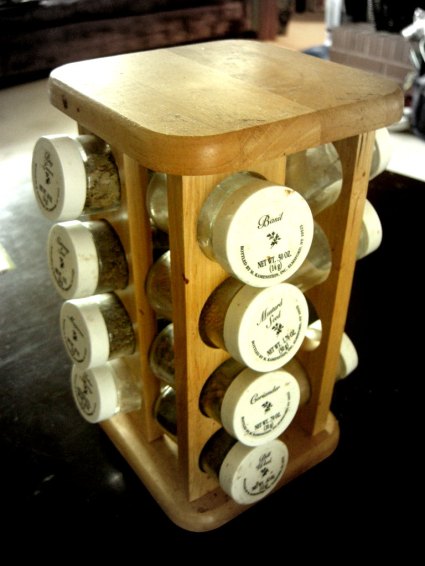
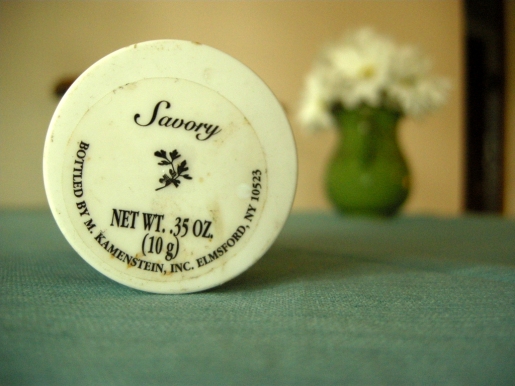
The spice jars were cleaned and old labels peeled off.
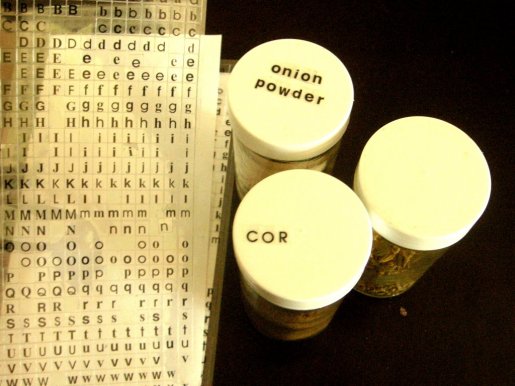
Acrylic craft paint was used to give the rack the perfect new color and finish.

Simple letter stickers were used to label the lids of the jars
Finally the jars were filled, the rack was filled, a new space was made on the counter for the rack and, voila, makeover complete!
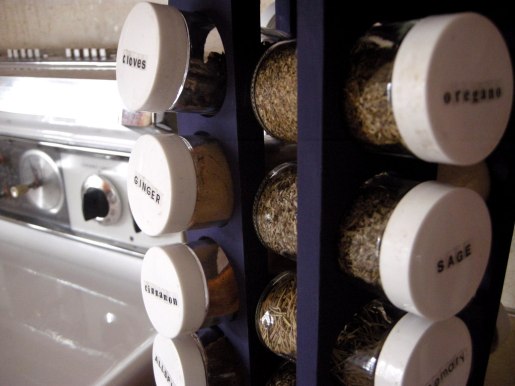
Thanks to this spice rack makeover, I can cook without the claustrophobia. 🙂
homemade peppermint foot cream and scrub
Feet. Our poor, tender, hard-working feet. Don’t they deserve a break?
Between a summer of heat, hiking and sandals, jobs that keep me on my feet 12 hours a day and the moment I smashed my big toe on the crush pad this fall (toe is fine, but toenail is gone), I know mine have certainly earned some pampering.
So, I went searching for some ways to treat my feet and was enticed by these pepperminty options. It only takes 9 ingredients to make both the cream and the scrub, several of which may already be sitting on the bathroom and/or kitchen shelves.
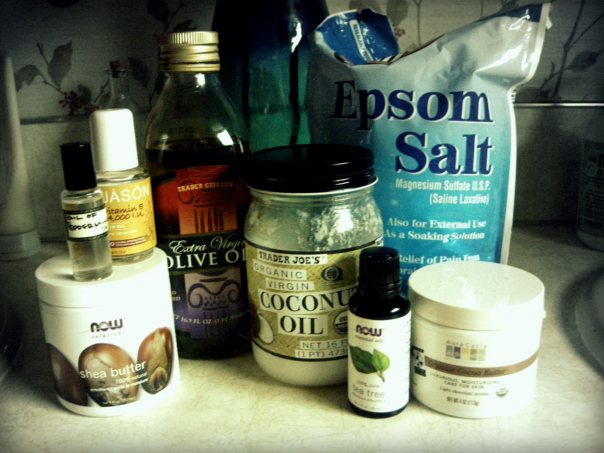
PEPPERMINT FOOT CREAM
Ingredients:
1 T. Cocoa Butter
1/4 cup Shea Butter (I used a little more)
2 T. Coconut Oil
1 T. Avocado Oil
1 t. Vitamin E Oil
1/4 t. Tea Tree Essential Oil
1/4 t. Peppermint Essential Oil
1-2 t. Peppermint Extract (optional)
My process:
1. Soften/melt cocoa butter. (Mine is in a microwavable container)
2. Combine all ingredients
3. Place container in freezer for 5 minutes.
4. Stir well and enjoy!
I am including the original instructions below as my process was a little more simple, but created more of a heavy lotion than a cream. Though I love what I created, I look forward to following these steps more closely and making a nice fluffy cream.
1.In a double boiler, melt the cocoa butter, shea butter, coconut oil, and avocado oil. Mix well and remove from heat.
2. Let cool until it starts to set up. Put it in the fridge or freezer to help this process go a little faster. Once cooled, add in remaining ingredients.
3. Using a hand mixer, whip lotion and then pour into desired container.
found recipe via pinterest on Robyns View

PEPPERMINT FOOT SCRUB
Ingredients:
3.5 T. Sea Salt (I used Epsom Salt)
1 t. Vitamin E Oil
1/2 t. Olive Oil
5 Drops Peppermint Essential Oil
Combine Ingredients in bowl. I made double the recipe, so that I had enough for a few uses.
To Use:
Massage scrub all over feet and then rinse off.
found recipe via pinterest on The Sensible Mom
I had such a great time creating and using these simple and delicious foot treatments. One of my favorite things about the process was the minty smell that filled the house on a rainy Monday morning. I also loved the results and look forward to using these products often.
Treat your feet and enjoy!!
pinspiration
It is a rainy and rare lazy Saturday afternoon and pinterest has me rather inspired by some cozy ideas that seem to match my mood. Since I am in a bloggy mood as well, here are a few of my favorite new pins from today…
1. Coffee Aroma Candles
Seriously, how simple and fabulous is this?
Candle holder + coffee beans + tea light = house smells like a coffee shop.

2. Dresser Bench
I am super inspired by this. It would be a fun project and would make such a great item for an entry, bedroom or guest room!

I would normally link this to original site,
but this was on etsy and is no longer available.
3. Pumpkin Bread Pudding
I read these seven words in the description of this and was sold:
cinnamon, ginger, pumpkin, spiced, bourbon soaked raisins
Can’t wait to try it!
4. Cozy Knit Scarf
I want to put this on right now. I love the mood of it. I love the color. I love the style.
Also, I have had this theory that I am going to break out the knitting supplies and this might be the inspiration that causes me to actually follow through!
tutu fun
 What turned into an explosion of tulle, glitter and tutu fun started quite innocently with a picture of a dancer that inspired me. In response to that inspiration, I decided to make myself a tutu. Normal, right? Once said tutu was created, I thought, “This would be a great project for all the kids I take care of!”, not fully realizing I was secretly on a mission to invade my world (and employers and friends houses) with glitter. That was followed by the creation of several more tutus for my friends and their kids. Dropping surprise tutu packages in the mail for a bunch of little girls is pretty stinking fun. At the end of the day, which I doubt the “tutu project day” has officially ended, I created or helped create 11 tutus. Okay, yeah, touching story I know, but shall we get to how to make the tutus??? Yes.
What’s great about this project is that it is fairly simple and inexpensive and has the potential to infuse joy/expression/fun for quite some time. I had heard that there was a no-sew way to make tutus, so I just googled it and found a video on youtube, which I am also including as a link at the end of the post.
What’s Needed:
fabric (which will probably be mostly tulle)
hairband or ribbon
scissors
 What To Do:
1. First, a trip to the fabric/craft store is in order. I ended up on several trips and buying a variety of colors and types of tulle. I also found some rolls of tulle, which saved some of the cutting.
(I find the thinner tulle to be more clingy and glittery tulle to be very generous in sharing its glitter with anything it touches as random fyi’s)
In addition to tulle, pick up ribbon or stretchy fabric headbands for the waistband if you don’t have those things.
2. Cut fabric into strips. The size of the strips will depend on the size and style of tutu that you want to create, but they should be twice the length desired for the tutu (because they will basically be folded)
The width doesn’t really matter. but I made most of mine about 3 or 4 inches wide.
The easiest way to cut the strips is to cut a large piece of fabric to the correct length, roll it up and then cut into pieces.
3. Attach the fabric to the waistband. This process is absolutely easy enough for a child to do, but might take a few tries to get the hang of.
First, fold a cut strip of the tulle in half.
Then, hold the loop side next to or under the ribbon or hair band.
Finally, pull the ends around the waistband and through the loop to secure.
(check out the link to the video below if that doesn’t make sense) 🙂
Once a strip of fabric has been secured, it can be pulled tight or left loose. It is really a matter of preference. I like them a little loose so that I can still move them around a bit if I want to squeeze a different color in somewhere or simply get more strips onto the tutu.
If a ribbon is being used, I recommend measuring it around the waist and tying knots on both ends where the ribbon meets, leaving plenty of ribbon for making a tie in the back when it is worn. This way, all of the tulle will stay secured within the knots and it will also be easier to tie later.
When using the hairbands, try them on the childs waist first to make sure that it doesn’t feel too tight.
Attach tulle strips to the waistband until you are satisfied with the amount of fabric on the tutu! Have fun with the colors and varieties of fabric.
4. Dance! 🙂
Check out this youtube no-sew tutu tutorial if you need a more visual instruction.
Also, here is a photo from my other blog that I took of one of the kiddos dancing around in their new tutu if you feel like checking it out.
Have fun!
homemade redness reducers
 I’ve been noticing some redness on my face lately (well, ok, for the last 20 years), so I took to researching natural home remedies to help calm my sensitive skin. After reading up in a few books and magazines and on dozens of websites, there were a handful of ingredients that clearly stood out as redness reducers, many of them because of their natural anti-inflammatory properties.
1. Cucumber
2. Aloe
3. Green (or White) Tea
4. Mint
5. Licorice
Honorable Mention: Oats, Witch Hazel, Turmeric, Vitamin C and Milk
A few ideas for homemade treatments:
-Cucumber, aloe and mint got mixed in the blender today to create a soothing mask. I also added a little honey to make it more thick and “maskish”. I spread the mask on, plopped some cucumber slices on my eyes and relaxed for 15 minutes. Honestly, I noticed a reduction in redness as soon as I took off the mask.
–Licorice powder and aloe combined could make a great mask as well.
-The cucumber oatmeal mask I have used and written about before fits the redness bill.
-I plan to try using white or green tea extract and licorice root extract as a toner of sorts.
There are lots of possibilities available between all of these ingredients and I’m very interested in any recipes others may have!
I read some things about a few of the ingredients mentioned that I wanted to share.
Witch hazel apparently has all kind of natural benefits, but some (rarely) do react to it and often it is sold at the store as a toner mixed with alcohol. So, try a little bit first and make sure you buy it natural.
Turmeric is apparently amazing for treating redness, acne, pigmentation, etc., but it may temporarily stain the skin, so be aware of this!
As I treat my body with more natural ingredients, I continue to notice positive changes and hope you do too!
a little self-love…box
 Coming into this new year, I spent several weeks defining goals, dreams and cravings and mapping out a road to success in achieving them (much thanks to my wonderful friend and founder of Stratejoy and her program, The Holiday Council…check it out!) There is sooooo much awesomeness I could share about all of this, but one of the most important moments of clarity I gained from the experience was this:
I need to be LOVING MYSELF.
This might seem an obvious thing to do as a human, but somewhere along my journey, I completely missed that turn. Now don’t misinterpret my feelings. I don’t dislike myself. In fact, I am a positive person with what I consider a fairly strong self-awareness and sincerity and I take pride in my strengths and accomplishments. However, I have struggled to truly focus on myself in a way that nurtures my soul and instead focus on others with unbalanced abundance or walk straight into selfishness in an unhealthy way and then wonder why I still feel unfulfilled and even guilty. My heart has been awakened to the reality that there is a distinction between selfishness and self-love and that I should be pursuing healthy self-love.
And so, I made loving myself one of my main goals for this year. Figuring out how to do this took some time and brainstorming and is still developing, but one tool that I have created is what I call my self-love box.
I started by making a list of ways that I could love myself. Then, I cut out a bunch of little hearts and wrote the items from my list on them.
Some of the thin gs from my list?
buy yourself a special treat
reach out to an encouraging person
get dressed up
take a nap
do something that inspires you
forgive yourself
dream, plan and go on a personal retreat
stop. breathe deep.
write yourself a love note
get a massage
be grateful. make a list of things you are thankful for.
Next, I found an inexpensive heart shaped box at a craft store and plastered it with some meaningful and inspiring pictures. The little self-love list hearts went inside and I am challenging myself to use the box several times a month.
Creating this simple little box and using it has been a rewarding and wonderful experience thus far and I recommend doing something like this to absolutely anyone. Whether you create a box or a list or not, though, please remember to LOVE YOURSELF! You are worth it!
xoxo
homemade honey nutmeg mask
As I’ve mentioned before, my sensitive skin and I are on the search for some great homemade beauty products. When I saw a post about this acne mask, I knew I had to give it a try.
All three of th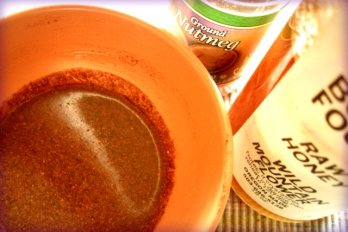 e ingredients in this mask help to heal the skin. Nutmeg has long been known and used as an anti-inflammatory and has antiseptic properties, making it incredibly healing. Honey is a natural moisturizer and is packed with antioxidants. It heals, protects and rejuvinates. Milk is naturally soothing and lactic acid is also a great exfoliator.
I was a little nervous about this one because I had read some reviews in which people complained of their skin burning (most likely due to nutmeg sensitivity), so I tested a small area before I smothered it all over my face. Green light. The mask was simple to make and easy to apply. I have to admit that while it was on, I felt nothing. I wasn’t sure that it was actually doing anything, but once I took it off my skin just felt happy. I look forward to using this again!
Ingredients:
1 Tablespoon Raw Honey
1 Tablespoon Ground Nutmeg
1 teaspoon Milk (recommend whole organic)
1. Combine ingredients.
2. Spread mixture generously on face and neck and let sit for 10-15 minutes.
3. Wash mask off with water.
found recipe on huda beauty
homemade cucumber mask
If you know me, you know I have crazy sensitive skin. (yay!) If you don’t know me, you know that now too, I guess. I sunburn in about a half a second, have a bazillion allergies and have been trying forever to find beauty products that I can use safely. I don’t know why it took me so long to get in on the homemade beauty product scene, but I am there now.
Below is a recipe for an oatmeal cucumber face mask. All of these ingredients have benefits for your skin. Basically, I just threw it all in a blender and then put it on my face. Simple. It pretty much looks like cucumber oatmeal out of the blender. (Okay, so it basically is cucumber oatmeal) I was a bit apprehensive at first…thought it was going to slide off of my face and get all over my clothes. Still, I was hopeful, so I put a headband on, put a towel on the floor and put the mask on. I also set aside a couple cucumber slices for the eyes. Let the healing begin!
About a minute into the experience, I thought, “I have cucumber oatmeal on my face. What am I doing?”
Two minutes into the self-made spa moment, I realized the mask was not sliding off my face, but I was still feeling a little silly.
Then, somewhere around minute three, I felt the mask working. It tightened and my skin felt tingly and cool in a refreshing sort of way.
I kept the mask on for about 20 minutes. The last 17 minutes were spent trying to let my body re-teach me how to relax. Seriously, when is the last time you actually cleared your mind and tried to relax your muscles intentionally? It had been a while for me. (sleeping doesn’t count)
After I washed the mask off, my skin felt and looked refreshed. And, surprisingly to me, I felt refreshed. Overall, this was a very positive experience and I will absolutely make this mask again.

Ingredients:
1/2 Cucumber, cut into chunks
1/4 cup Oatmeal
1 T. Raw Honey
1 t. Aloe*
1 t. Avocado Oil*
1.Combine ingredients in blender or food processor.
2. Spread mixture generously on face and neck.
3. Lie down and relax for at least 15 minutes.
4. Wash mask off with water.
*The aloe and avocado oil are optional and avocado could be used in place of the oil as well.
Enjoy!!
colorful cash envelopes
Last year, I finally decided to embrace a cash envelope system to help control my budget. (something that has gained much popularity thanks to Dave Ramsay’s Total Money Makeover). While browsing pinterest one day, I came across some fun handmade cash envelopes and was inspired. (I can no longer find said pin) So, before the start of the year, I made my own. (My mom helped a lot…she is a much more skilled at sewing than I am)

I had a lot of fun making these and enjoy using them.
First, I chose the fabrics I wanted for the envelopes and for the purse/clutch/large envelope to hold them all. All of these fabrics came out of my moms sewing closet and are fun because I had clothing made out of many of these as a kid.
After figuring the right size for the small envelopes, I got to marking and cutting.
Then, to add a little stiffness to them, we used some Pellon Wonder Under to line the fabric.
Finally, the fabric was sewn into envelope form (simply folded over and sewn on both short sides).
A small velcro piece was added to the inside to help protect the precious cash!
The large envelope/clutch was made last to ensure it was cut to the proper size to fit all the envelopes. It was lined with with another fabric and a snap enclosure was attached.
I have not been using any sort of labeling system for my envelopes, but have seen that many do so with velcro fabric labels or cardstock insert style labels. I simply assigned different fabrics to different spending categories and have come to know which is which. 🙂
My main categories are groceries, dining, transportation, entertainment, hobbies, personal care, home & office, gifts and clothing.
Once the budgeted cash is gone for the month, that’s it…it’s gone! Currently, I roll over any left over cash to start off the next months normal budget. Eventually, I plan to put the leftovers into savings each month. I do, however, put all my left over coin change into my change jar, CJ.
Check out some more tips from Dave Ramsay on using the envelope system.
an inspired book
 I recently finished this simple little project that I love and would recommend making one to anyone! It is a notebook/journal of sorts to specifically keep thoughts and ideas that inspire you.
Materials I used:
a variety of fun scrapbooking papers and pens
scrapbooking tape and spray adhesive
papercutter
hole punch
binder rings (these are cheap at office supply stores or you could use ribbon or other items)
8×8 chipboard book board (I had this on hand, but it could be easily done with cardstock or something like that)
a personal collection of inspiring things
 The Process:
I will be the first to admit that I made this much more complicated than it needed to be, but I loved every minute of it so I really dont care!
1. Select and organize papers for pages. This is where I only made my life more challenging and fun. My chipboard was 8×8, but I mostly had 12×12 paper, so I selected the ones I wanted, put them in the perfect order and then measured and cut each one down to 8×8. A normal person would have gone to the store and purchased 8×8 papers. Whatever. Moving on.
The following two steps aren’t needed if you decide to use hole-punched page protectors, which of course I did not. If you are less awesome smarter than me, skip to step 4.
2. Stick together. Because I wanted to create a book where I use both the front and back of pages and I did not want every other page to be white, my next step was sticking pages together. I laid everything out and flipped through it to make sure it was in the right order. Then, I used both scrapbook tape and spray adhesive to attach the pages.
3. Hole punch time. My next step was to hole punch all of the pages. I used the already hole-punched chipboard and a piece of cardstock to mark the hole placement, punched the holes in the cardstock and then used it as a guide to hole punch the rest of the pages. (Of note, probably also a little more complicated than needed, but, um I only had a single hole puncher…just trying to keep things simple here people)
4. Cover Creation. This part was really fun. I wanted my cover to be colorful and unique, so I glued a beautiful piece of scrapbook paper to the chipboard and then used letter stickers (different style and color for each letter) to spell out “inspired”. There is so much room for creativity on the cover!! I wanted to be sure that I wanted to pick it up when I saw it. 🙂
5. Putting it all together. The next step was collecting the book and cover together and getting it all lined up. Then I worked binder clips through the holes and, voila, the book had been created!
Of course, filling in the content is the last part of the process, which for me will be continual as I am treating it as a journal and book. However, I have used each page differently so far. Some I have handwritten. Others are more artsy. For some, I printed out content and attached it. My goal is to make it as inspiring to me as possible.
I hope you enjoy this idea! Please feel free to share ideas or photos if you make or have your own. 🙂
